Thursday 27 September 2018

Our time in Menindee for 2018 has come and gone

The Darling River (Photo copyright: Anne Lawson 2018)


Outback New South Wales has had no decent rain for two years, and the country is suffering. There are few species out, and we were unable to find any of the 39 plants still left on our list. So, no paintings of new plants.


At Lake Pamamaroo (Photo Copyright: Anne Lawson, 2018)
We have been asked by the Herbarium to recollect species. They are interested in having a comprehensive collection of plants from the same location, collected at the same time, but in different conditions. We found some to recollect.

The Darling Pea is out along the Darling River banks flowering and growing to about 1m, although not as high as our first year in 2010. The black blue bushes are all grey …. except for the odd one being an intense almost viridian green blue, plenty of young fruits are their usual bright lime green. The Bracyscome multifida and the little pink Convolvulos are happily flowering, the Centipeda is en-masse at the receding lake. And the senna bushes are everywhere.
The Centipeda did need some rehydration in the sink before it could be pressed for the Herbarium!

While there was not the usual hum of collecting and painting in Menindee's Civic Hall during the week, we did keep busy,  recollecting what we could find, working on unfinished paintings and creating a field guide for the plants left to be found. 


Our important reference book, with labels of the plants we are still to find
(Photo copyright: Anne Lawson, 2018)
The plants here have evolved in this harsh environment, and have developed strategies that help them survive in the long term. When the rains finally come many of our little treasures will emerge.
Seeds waiting for the rain. (Photo copyright: Anne Lawson 2018)


Wednesday 28 February 2018

Panel discussion of Beckler's Botanical Bounty at the Australian Garden, Cranbourne

Beckler's Botanical Bounty
Sunday 4 March 2018
 
2.00-4.00pm

Australian Garden Auditorium, Cranbourne Gardens


Click here for directions
Members $15
Non-members $20
Students $5
Bookings are essential; ring 5990 2200 for more information

Invitation for you and your friends to a special afternoon of adventure, history, botany, art that also includes afternoon refreshments!

Presenters will include:Dr Linden Gillbank, Honorary Researcher, School of Historical and Philosophical Studies, University of Melbourne, who contributed the essay on von Mueller and Hermann Beckler in Burke & Wills, The Scientific Legacy of the Victorian ExpeditionDr Roslyn Glow OAM and Jan Rosenberg,  participating artists will illustrate some of the excitement of plant discovery and portrayal; Mali Moir, leader and coordinator of the project will outline some of the botanical and artistic challenges and what may be seen at the Ballarat Gallery. 

The fate of Burke and Wills on the Victorian Exploring Expedition in 1860 is familiar to most Australians. What is less acknowledged is the considerable scientific legacy left by the scientists who joined the Expedition – surveyor, astronomer, meteorologist, geologist, mineralogist, zoologist and botanist. This last role was fulfilled part-time by medical officer and botanical collector, Dr Hermann Beckler.

Beckler was to resign when the Expedition reached Menindee on the Darling River. He remained there awaiting a replacement doctor for the Expedition, and was at last able to make considerable progress with his botanical findings. He sent 120 plant specimens to Ferdinand Mueller at the Melbourne Herbarium, where they are housed. Only one plant specimen was painted in the field, and this task was never completed.

As part of the 150th recognition of the Expedition, a group of Melbourne botanical artists decided to celebrate Dr Hermann Beckler's contribution by revisiting his plant collections made in Menindee. Every year since 2010 a group, led by botanical artist Mali Moir and with generous help from botanist Andrew Denham, has spent time searching for, collecting and pressing specimens for lodgement in the Melbourne and Sydney herbariums, and painting them.
 
This exciting and challenging project has culminated with the Beckler's Botanical Bounty Exhibition at the Ballarat Gallery, opened on 27 February by Professor Tim Entwisle, Director of the Royal Botanic Gardens Victoria. 
The Cranbourne Friends botanical illustrators group will be travelling to Ballarat to see the exhibition on Wednesday 14 March. All welcome. 

Wednesday 10 January 2018

Exhibition at the Art Gallery of Ballarat

Preparations are well underway for our exhibition.
Beckler's Botanical Bounty Exhibition
25th February to 27th May 2018
at the Art Gallery of Ballarat
40 paintings, by 24 artists,  have been selected. These paintings are stunning representations of the plants of the Menindee area. All have been painted with scientific accuracy and many have microscopic dissections of seeds and reproductive parts of the plant.
With us in Menindee have been other artists, including a film artist, and their work will be on display too.
​So a total of 27 artists!


You can watch a slide show of photos which explains and documents the project. We also hope that it will give you a glimpse into our favourite arid inland area, and understand what it is that draws us back each year.

There are cabinets of objects that will allow you to dive deeper into our four themes ~ Art, Country, History and Science. For example you will be able to see the actual painting tools used to create one of the art works. Alongside these are the sketchbooks, colour charts and working drawings, showing the preliminary work before paint gets put onto the good paper. Personally I love little peeks 'behind the scenes', to see how art works are created.


And there will be a catalogue for you to buy, to take away and read at your leisure.

So lots to see. The Gallery is a short walk from the Ballarat station and the town has plenty of other things to offer. Gather some friends and have a  perfect day's outing!


Monday 14 August 2017

Last chance to help out the Project

Thank you to those of you who have donated to the Beckler's Botanical Bounty Project. We really appreciate your support for our unique project.

If you haven't donated, but have every intention to do so, you will need to hurry, as the crowd funding closes in a few days.

Follow the link to donate

I would like to support Beckler's Botanical Bounty

.....and just in case you would like some more information about how your donation will help us, go here to find out more


Wednesday 5 July 2017

Can you help?

We are seeking support and financial assistance for this unique Project.

You donate through the following link

https://australianculturalfund.org.au/projects/becklers-botanical-bounty-of-menindee/


Our Project is creating beautiful and scientifically accurate botanical paintings and pressed botanical specimens of the 120 plant species on the National Herbarium of Victoria list, as collected in 1860 by Dr Hermann Beckler in the vicinity of Menindee (south-east of Broken Hill). 


We have always been aware that our Project has a place in history. It has brought Dr. Beckler's contribution to Australian plant knowledge to the fore. Our collected specimens sit alongside Beckler's in the National Herbarium of Victoria, and each specimen has  a detailed record of habitat, soil conditions, GPS location and so on. This provides current data on plants that exist in the Menindee Lakes/Kinchega National Park area, data that when combined with Beckler's collection, could be very useful for longitudinal studies. It is a great example of how citizen scientists can contribute to scientific knowledge.


Preparations for the exhibition of the Project are well under way, where we will display at least 40 art works at the Art Gallery of Ballarat in February 2018

However we hope to develop resources to support the outcomes of the Project in the form of several publications. Your donation will help to fund those resources.

As Beckler’s Botanical Project is self-funded and unincorporated, we have registered with the Australian Cultural Fund https://australianculturalfund.org.au/ which will facilitate crowd funding for us.

For the next month or so, the ACF will accept tax deductible donations on our behalf. If you are interested in this Project and wish to provide some financial support to support the future Project outcomes, please do so through ACF: 

Donate to Beckler's Botanical Bounty campaign


We hope you will be able to contribute to this historical project.

Wednesday 16 November 2016

The process of painting Atriplex stipitata

In this final post in the series, Roslyn Glow takes us through her process of her painting of Atriplex stipitata. If you would like to catch up with the other posts, the first is about identification and research  and the second about composition and colour matching.

Little details
On my (practice) painting paper I paint a few leaves and fruits, bigger than life size, then life size.   This helps me to get the colours right, and to select the best approach for applying the paint.  For example I could use a series of colour washes, (wet in wet) or dry brush technique.  This plant has few large areas, so washes are of limited use.  For some of the detail I use the fine brush (Winsor and Newton Series 7 sable000) like a pencil. 

Measured drawing
I draw a frame for my picture, using a 2H pencil.  I mark out important landmarks, such as the highest, lowest and widest points on architect’s tracing paper.  This paper is robust enough to withstand repeated erasures, but thin enough to allow me to trace through it. 

I draw the plant as accurately as I can within the limits of the composition.  As the leaves and branches are fairly congested, I sometimes put a piece of paper between the branches, in order to see the plant’s structure more clearly, and I omit some of the leaves and tiny branches, endeavouring meanwhile not to loose track of the structure of the plant. Because of the plant’s congested nature I have to pay particular attention to connections, rather than obscuring it by too many overlapping details, so that the viewer will understand the structure.

Transferring the drawing
I can use either a light box  (or window lit from outside) or reverse tracing to transfer the image to my paper. Reverse tracing involves going over my drawing on the reverse side, using a 2B pencil. It is quite hard to make sure all the details are included.  When I am satisfied I place the tracing paper on top of my painting paper (Arches 300gsm smooth) right side up and trace it again, using a 2H pencil to transfer the image onto the plain paper beneath.  Then I have to go over the drawing carefully, with a 2H pencil, to make sure the details are preserved.  The tracing process tends to blur some of the connections and details, so I sharpen them up.

Colour mixing
Before I can put colour on my painting I need to mix enough of the main colours  (various shades of greyish green and brown).  I do this by checking with my colour patches, the original specimens having dried out and changed colour by this time.  


Painting
Now starts the hardest part. It is hard because mistakes are difficult to correct, and keeping the page clean is a challenge. It is best to test each dab of colour on a practice sheet before putting it on the paper.  A slight difference in the proportions of pigment and water can make a huge difference on the page. If it is too dark, correction is difficult.  

I use tiny 000 brushes for the twigs, slightly larger for the leaves.  I love to see the coloured image emerge from the paper. But it is hard to slow down and paint thoughtfully, carefully, slowly, systematically. Despite the concentration required, I find it satisfying when I can find the right balance between concentration and tension. I haven’t yet given serious thought to the problem of getting the glistening texture of the plant right.  For the present it is enough to paint the twigs and branches.

This part of the process is the most time-consuming. I have particular difficulty getting enough contrast between the light and darker sides of each part of the plant, not least on the branches. Getting the appearance of solidity by placing the highlight, shade and reflected light in the right spots is not intuitive for me.  I have to work it out by following rules, rather than being able to paint what I see.   My first attempts are not very good but can be improved. Painting stems that are three dimensional and very small is quite hard.
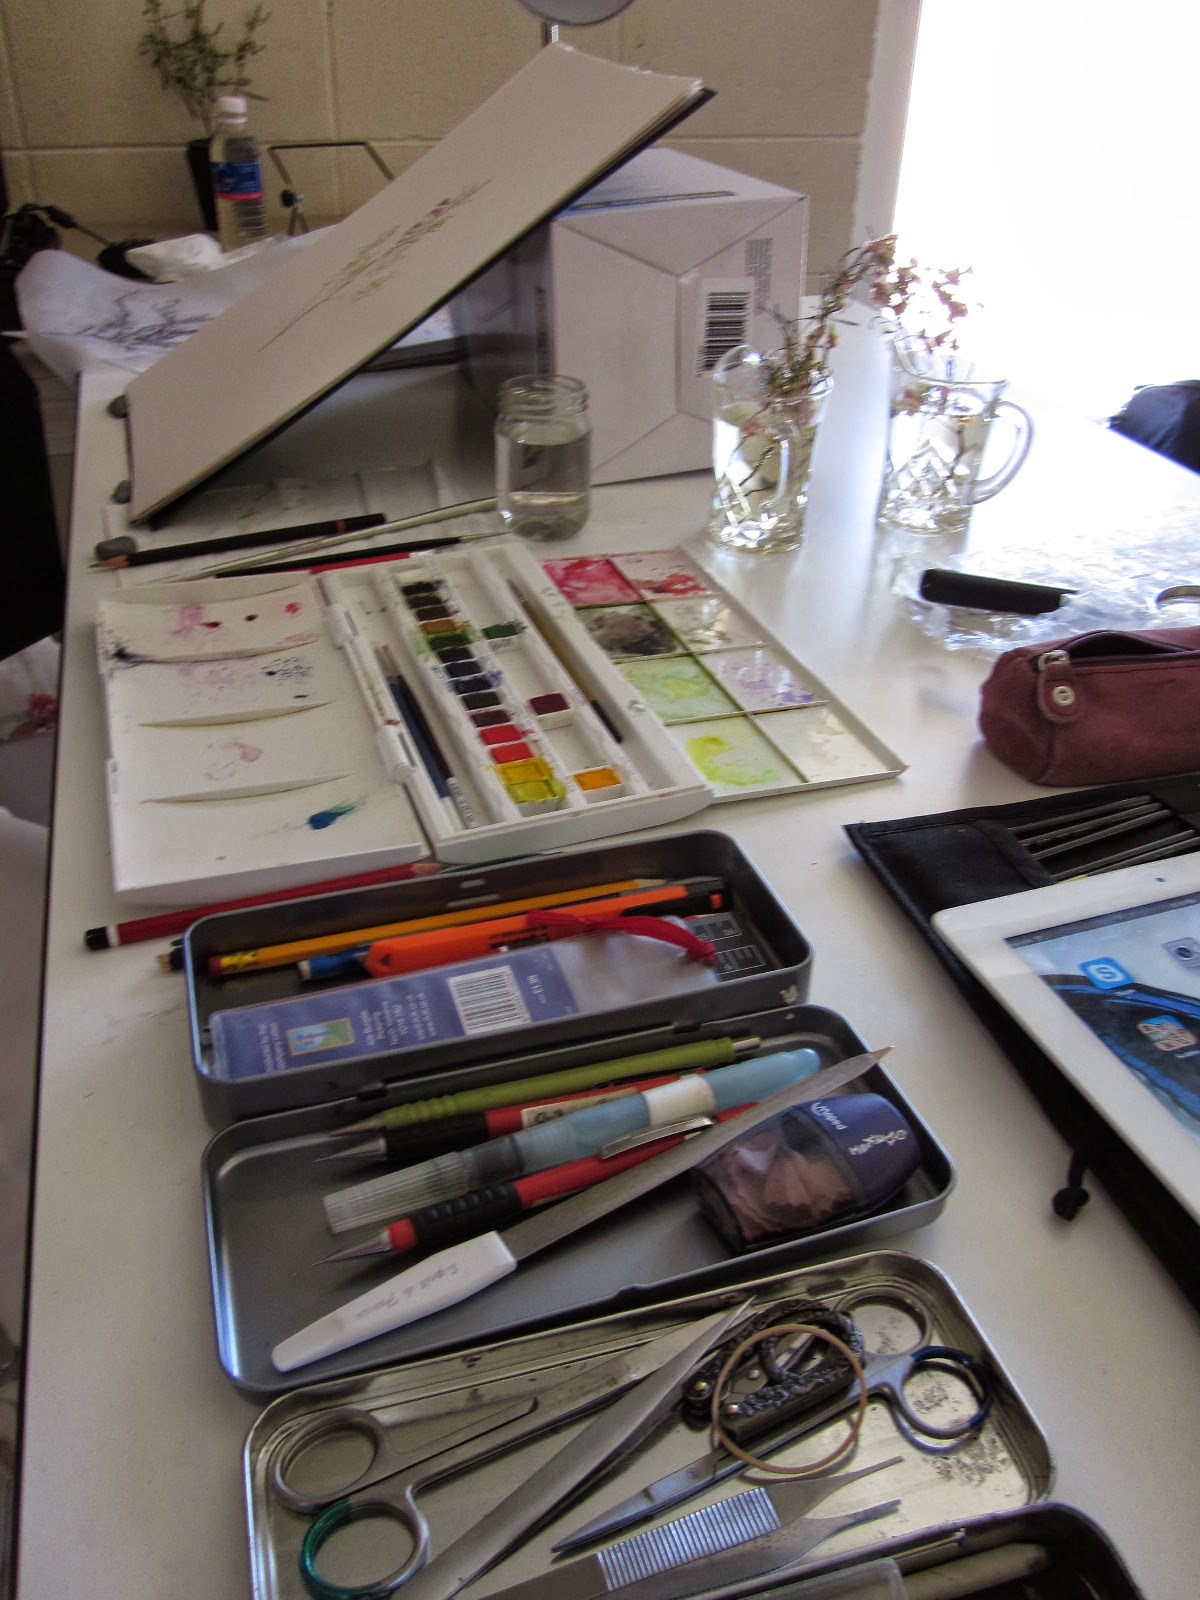
Painting in progress (Photo copyright: Roslyn Glow, 2015)
Perhaps my tiny brushes are too soft.  I buy a few new brushes, in the smallest sizes. Like most artists I am always keen to hear of a better brush, or new watercolours. 
Getting enough variation of light and shade in the leaves is a similar problem to getting form into the stems. I don’t worry too much about this at first, as I can add darker colour later, but with so many tiny leaves I know it will take some time before I am happy with it. 

When I have given a preliminary coat of paint to all the branches and leaves I turn my attention to the addition of enlarged details. I go through the same process as before, composing and drawing. I decide to include the fruit and the male flower at four times their natural size. When I have completed the drawings on tracing paper, I try out different positions on the main painting. It is unfortunate that I don’t have a female flower. The fruit and male flower will have to suffice. 

Since I placed the female plant to the left of the male, I follow the same sequence, placing the fruit to the left of the male flower. This is unconventional, the usual sequence being male flower, female flower, fruit, but it seems to be neater to have the details in the same order in as the main depiction. With forethought, I could have ordered the two plants more conventionally male on the left, female on the right. 

Adding the magnified details
I trace the two details onto the main painting and paint them as before

Depicting the salt crystals on the enlarged detail
I consult Margaret Holloway about this problem. She encourages me to try as many approaches as I can think of. The main contenders are the luminescent range of water-colours by Daniel Smith, and Windsor and Newton’s Iridescent Medium. I try numerous combinations of Daniel Smith’s colours, with names like Pearlescent Shimmer, Interference Silver, Iridescent Jade and Duochrome Green Pearl. I am grateful for the fact that Daniel Smith provides ‘Try-out sheets’, so that one can experiment with numerous colours before buying. The particles in the Daniel Smith colours seem too small for the effect I am reaching for. I try the Windsor and Newton Iridescent medium and settle for it. The resemblance to the magnified look of the plant parts is not close.  My depiction looks flat whereas the crystals look quite three dimensional under the binocular microscope. It is the best I can manage.

Finishing the painting
I return to the full painting, concentrating on increasing the contrast between light and dark areas, and adding details such as the red tinge on the edges of the bigger leaves. 
The finished painting of Atripex stipitata (Photo and image copyright: Roslyn Glow, 2015)


I am happy with the result. My modest plant has taken on a more important look when subjected to such scrutiny and attention to detail. 

References
  
Cunningham, GM, Mulham, W E, Milthorpe, P L and Leigh, J H Plants of Western New South Wales  CSIRO Publishing, Collingwood, Victoria, 1992, 2013.  Pp 242, 244-5.

Landon, Carolyn  Banksia Lady: Celia Rosser, Botanical Artist  Monash Univeristy Publishing, Clayton, Victoria.  See especially Chapter 9: The Painting


The process of painting Atriplex stipitata

The second in our series about how Roslyn Glow goes about painting her plant Atriplex stipitata. Her first post was about her research into her plant.

Colour matching
It is important to get the colours right before the specimen dries out /dies/fades. I paint little patches of colour and label them. I use the same paper as my final painting. 
Part of my colour matching (Photo copyright: Roslyn Glow, 2015)
I notice that, under a hand lens or microscope, the surface of the plant looks as if sprinkled with crystals of some kind. Since this is a salt bush, I infer that they are salt crystals.  I don’t know how to depict this. I discuss it with others.  Mali Moir, project leader, suggests that Margaret Holloway (an artist involved in this project) has solved a similar problem.  I make a mental note to consult Margaret when I get back to Melbourne.  

I paint a blow up of the fruit and of the male inflorescence, using the binocular microscope. I don’t have a digital microscope, so I try to photograph parts of the plant through the binocular microscope. This is not really successful.
(Photo copyright: Anne Lawson, 2016)


Composition
The next task is to decide on a composition.  

Ideally the painting should show the back and front of a leaf, a bud, a flower, a fruit and any feature used to identify the species, including microscopic studies if microscopic features are essential for identification. Since the plant is dioecious, these details should be present for both male and female plants. The habit of the plant should also be shown, either in full or by implication.  We can’t always reach the ideal.   

I play around with my specimens, before realising that with only one small fragment with a fruit and a couple of sprigs with male inflorescences, my options are limited. Celia Rosser, who painted all the banksias was careful to show all stages of growth of buds to mature fruits.  This often required her to paint more than one branch.  She carefully arranged two branches into a pleasing composition.  Sometimes, at first glance it looks like a single branch, but the two branches are always separated although they form a single composition.  I decide to follow a similar path. 

I arrange my two sprigs as best I can.    We are taught to do a series of ‘thumbnail’ sketches before committing to a composition.  I can’t think of any more than one.  I consult Pam McDiamid, a fellow artist whose skill in composition and speed of decision making I much admire.  She realigns my larger sprig.  I am happy with the result.  She advises me to do the thumbnails.  I prepare the thumbnail sheet, but can’t think of any alternatives.   The big decision is whether or not to include microscope studies, and if so, which details should I depict, at what magnification.  And where should I place them.

Recording the composition
I photograph the specimen in its chosen position.  I will print these photos when I return to Melbourne.

Rough sketch

I make a series of rough sketches, using my softest pencil (an 8B), on sketch paper.  The size doesn’t matter, in fact the bigger the better, to get the character of the plant.  The series ends with one in 2B, at about the right size.   This is the part of the process I enjoy the most. 

Next time, in the last in the series, Roslyn will take us through the painting stage, and you will be able to see the finished painting.

The process of painting Atriplex stipitata

Once we have identified our plants the painting begins. In this series Roslyn Glow will take us through the process she uses to create her botanical portrait of Atriplex stipitata
Saltbush country (Photo copyright: Anne Lawson, 2016)
Roslyn's description was written for our honorary botanist, Andrew Denham, and she has allowed it to be reprinted here. This first part was published on the bog last year. We will publish the whole series over the next few weeks.

Getting to know the plant  
Atriplex stipitata (Bitter saltbush, Mallee saltbush, Kidney saltbush) is a modest subject, but I know from experience that, no matter what my initial reaction, by the time I have studied a plant and found out a bit about how it makes its living and the history of its discovery, I will undoubtedly find it fascinating. 
My specimen of Atriplex stipitata (Photo copyright: Roslyn Glow, 2015)
I turn the specimens around, and view them from every angle.  Because very little material is available in this case, I have little to choose from.  I try to identify the male and female flowers.  The female flowers are hard to identify. They are said to occur singly or a few together in the leaf axils. I paste various parts of the plant onto a scrap-book page, using book covering film. 
Scratch pad page with pasted parts of the plant, colour swatches and sketches of plant parts (Photo copyright: Roslyn Glow,  2015)
There is not enough plant material to paste up a complete series of parts and look at them under the microscope as well. The fruit is easy to identify. I look under the microscope, and try to dissect what I think is a female flower, but am unable to identify any parts.  (Later I find that the female flower can be embedded in the material of the stem, unable to be examined until dissected out.) There is only one little specimen that is clearly female.  I choose the more handsome of the specimens with male inflorescences, to depict in my painting.
That night, I use my iPad to research the plant. Next day I copy the most important identifying features of the plant onto my sketchpad. I am interested to find that this species can be monoecious or dioecious.  Mine is dioecious, that is male and female flowers are on separate plants.

The  “Picture Book”  (Cunningham et al) has a picture of my plant, and a drawing of the fruit.  I trace this drawing onto my sketchpad. 

I note that my specimen’s leaves are partially closed, while the photos on the internet show the leaves as more or less flat.  Eventually I discover the reason for this.  When the soil is very dry, the leaves close, presumably to help conserve moisture.  My specimens were clearly thirsty. 

Google finds me plenty of photos of A. stipitata but no paintings, and few 
drawings. The only comprehensive one is by Margaret Flockton, (1861-1953) the first person employed in Australia as a botanical illustrator. 
A. stipitata by Margaret Flockton
It is possible that an unpublished  collection of paintings of the plants of the Broken Hill area, held in the National Library in Canberra, includes a painting of A. stipitata, but I can’t be certain of this.

Next time Roslyn will show us how she composes and selects the right colours for her painting.

Sunday 30 October 2016

Out in the bush, finding our plants

Finding the plants that Beckler collected on  the Burke and Wills Expedition is not always easy!
We are always grateful to our friends who have expert knowledge of plants in the area.
Our first foray was back along the Broken Hill Road.
It always amazes us how  so many little  plants grow in what looks like a boring salt bush habitat.
You just need to get out of the car  and have a potter around.

So we collect (with permission and according to herbarium guidelines)
plants that we think are on Beckler's list.  Then it is back to the hall to make  final identifications.
Photo copyright: Anne Lawson 2016

Photo copyright: Anne Lawson 2016

Photo copyright: Anne Lawson 2016

Photo copyright: Anne Lawson 2016

Photo copyright: Anne Lawson 2016

Photo copyright: Anne Lawson 2016

Saturday 2 April 2016

Save the Date!!

We have a date for our exhibition!

February 2018
at
The Art Gallery of Ballarat

Yes, it is a long way off, but we have lots to do to make sure it is the best possible exhibition. So, pop it into your long term calendar to make sure you don't miss coming to see it.

The beautiful staircase at the Art Gallery of Ballarat

Friday 27 November 2015

How to paint Atriplex stipitata ~ a process, by Roslyn Glow

What is the process an artist uses to paint her plant? In this series Roslyn Glow will take us through the process that she used for Atriplex stipitata.
She begins by getting to know the plant.


Atriplex stipitata is a modest subject, but I know from experience that, no matter what my initial reaction, by the time I have studied a plant and found out a bit about how it makes its living and the history of its discovery, I will undoubtedly find it fascinating. 

Atriplex stipitata

I turn the specimen around, and view it from every angle. I try to identify the male and female flowers, but the female flowers are hard to identify.  I paste various parts of the plant onto a page,  using spirax book covering film. 

There is not enough plant material to do a complete series of parts as well as looking at them under the microscope. The fruit is easy to identify. I look under the microscope, and try to dissect what I think is a female flower, but am unable to identify any parts.  There is only one little specimen that is clearly female.  I choose the more handsome of the specimens with male inflorescences.

That night, in the middle of the night, I use my Ipad to research the plant.  As I have no printer with me, I forget most of what I find, but next day I copy the most important identifying features of the plant onto my sketch pad. One interesting thing is that this species can be monoecious or dioechious.   Mine appears to be dioecious, that is male and female flowers are on separate plants.

Unfortunately our main reference book, Plants of Western New South Wales (Cunningham et al) does not have a picture of my plant, but it does have a drawing of the fruit.  I trace this drawing onto my sketch pad. 

I am interested in the fact that my specimen’s leaves are partially closed, while the photos show the leaves as more or less flat.  Eventually I discover the reason for this.  When the soil is very dry, the leaves close, presumably to help conserve moisture.  My specimens were clearly thirsty. 

Google finds me plenty of photos of A. stipitata but no paintings, and few drawings. The only comprehensive one is by Margaret Flockton, an important Australian botanical illustrator. 

It is possible that an unpublished  collection of paintings of the plants of the Broken Hill area held in the National Library in Canberra includes a painting of A. stipitata, but I can’t be certain of this; it requires more research than I can do in Menindee.


By Internet Archive Book Images [No restrictions], via Wikimedia Commons

Wednesday 28 October 2015

Interview with Jan,

What is it that attracts artists to this Project? How did they become involved and what delights them about the plant they are painting?

Jan is our first artist from the 2015 trip to answer some of these questions, and more, including the tribulations in finding her plant.

Why did you become involved in Beckler’s Botanical Bounty Project?
When Mali [Moir] outlined the project, my first thoughts were what a great project it was, covering art, science and an amazing part of Australia's history. Dr Beckler, working for Ferdinand Mueller, the director of the Royal Botanic Gardens Victoria, contributed a great collection from this area to our herbarium. Wouldn't it be great to see if now, 150 years later, we could find the same plants.
What else is interesting for me is to see the impact on the flora of the area,from damming, sheep grazing, farming and general human impact. So far out of our 120 Dr Beckler identified/collected specimens we have found 78 survivors. 

What plant are you painting this year? What attracted you to this plant?
Andrew, our botanist, found a Convolvulus clementii from Dr Beckler's list. As I had painted Convolvulus remotes he asked if I would like to paint this one too. 

In a highly excited state Ros and I combed the GPS point where he had located it, 30 mins out of town on a corrugated road in blazing heat, smothered in flies but unfortunately returning home empty handed. Mali and Anne accompanied me to again look the next day. To my surprise we found poor little Convolvulus clementii struggling to make its way in the harsh conditions. The specimens were small and not well established, ie not representative of the habit of more well established C.remotes which twines itself around on nearby plants.

Poor little Convolvulus clementii struggling to make its way in the harsh conditions

Next day while I was painting Mali urgently called out from the back yard of the hall. Here in the garden bed of the hall was my dear little clementii doing what he should - sending long tendrils out in search of something to twine around - a much healthier specimen. 
C. clementii happily growing outside the hall
I had seen Convolvulus remotes on the footpath opposite the hall and thought I would look there too. Here was a tangle of clementii very healthy and completely rampant!! So much for combing the desert!
The rampant clementii!
A small piece of Convolvulus clementii, waiting to be drawn

I also will paint a daisy Asteracea Senicio lanibracteus. Classified as vulnerable in some areas, in Menindee it grows in abundance along the road sides.
The Senicio lanibracteus specimen ready to be painted
How will you go about painting it? 
Firstly I took photos of the plant in its habitat to show its habit. I then took close up photos of various parts of the plant, ie. root, stems, leaves and flowers. I have done some microscopic work on the seeds which I then drew on tracing paper.
I measured and drew the plant on more tracing paper. It is yet to be interpreted into a watercolour painting.

Drawing Senicio lanibracteus